

Friday, August 31, 2012
untitled288
Thursday, August 9, 2012
untitled287


 |
| Click to watch the Video. |
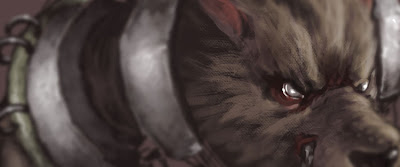
This work is done for a college assignment in which the requirement is we have to produce a short clip with a compositing software in a duration of approximately 40 seconds. I combine 3D modeling with 2D background to practise my poor compositing skills. Also I chose to do an organice modeling as I want to improve more on my understanding in Zbrush sculpting and Mental Ray rendering. The concept was roughly inspired by Predator and Alvaro Buendia's Feto modeling. The whole project took about 2 weeks on and off to complete.
Saturday, July 21, 2012
untitled286

Monday, May 21, 2012

Sunday, May 13, 2012
untitled284
My uncle is finally getting married, and here's a gift for both of them. Hope they'll be together happily! :D

 |
| Here's the steps, everything is done in Photoshop. About 10 hours of work I think. |
 |
| And a recent material study to improve my understanding on various material properties and how to render them. I should learn how to render with less strokes and yet maintain the level of detail! Everything is painted, no use of photo texture here. |
Well that's it for today, back to paint. See you guys again!
Friday, May 11, 2012
untitled283
More studies, I'm trying to keep a practice of doing two movie still studies from each movie I watched. Eventhough I knew it wont last long but heck better than none. Need to push myself or else I'm dropping out.

Anyway just some extra thing, I feel like sharing for a bit.
(I'm not a professional so correct me if I'm wrong alrite?)
There's no colour picking in these studies if you ask. When I first started doing these studies, I did use eyedropper tool to study the colour around the original reference. However I found that it's not so practical because I cant seem to remember what colour I used. I'm forcing my brain to remember the hues, value and saturation from the one I eyedropped, so just like reading a textbook, I forget it after I done.
Hence I decided to abandon that technique and force myself to pick colour on my own. It is a bizarre case at first as I'm picking such ugly colours that even my toe nails couldnt accept it. Picking colour on my own really works, as I myself is making the decision, not the eyedropper. I remember any shitty colours my eyes had chose and because I cant accept it, I remember it. And if I chose the right one, I'll be happy and because I'm happy, I remember it. Sounds stupid but it works.
So practice makes perfect. My eyes slowly react to these colours and became more sensitive towards any changes in them in each studies I did. It's not 100% accurate, but I can at least get a 90% down by my own eye judgement. Isnt that great? I cant even believe that I can do it as I've a mindset that I just couldnt choose the right colours before this. Screw that shit I just didnt practice.

So if you wanna try this, I'd advice you not to use the eyedropper. Maybe you can use it when you first started to get the idea of how things works, but it's not gonna do any use if you do it long term. Try to face the ugly truth and force yourself to paint with your eye judgement after a few tryout.
And for those wandering what does this studies do? It is to train your eye judgement and colour sense. To train your observation skill and how you train your mind to to be tricked by what it see. What benefit will you gain from it? You'll have a solid idea of how to match colours that seems weird together. In real life, not all the time the skin colour is greenish brown. It could be purple, blue, etc depends on the lighting set up. So by doing these studies, you can find out in different situations there will be a different hues for each objects and still look believable when putting together.
These are my own purpose of doing these studies btw, different artist had a different mindset, some are already good in colour but still do it, maybe to update their colour library, or some even wanna practice human figure, perspective drawing, light and mood, composition, etc. It depends on what you're looking for so know what you want to gain from it.

Put this here as I kinda like the lines in this one lol. Been awhile since I draw any figure studies so kinda miss it.
Cheers and see you again!
Friday, May 4, 2012
untitled282
Been awhile since my last update, not quite used to this new blogger interface though. Here's something from me, not much cuz I'm slacking off. Bleh
 |
| A life drawing in Pencil, inked by pen. |
 |
| Ballpoint pen sketches, some were from newspapers and imagination, while some were from Kim Jung-gi's 2011 Sketch collection. |
 |
| Ballpoint and blue pencil sketches of my girlfriend. |
 |
| Don't rape me. |
 |
| 2 colour studies from Girl with the Dragon Tattoo. |
 |
| Maya for base mesh, Zbrush for details sculpting, polypainting and rendering, Photoshop and After Effect for compositing. |

 |
| Rentap, an original design by me of a warrior from Sarawak, Malaysia. |

 | ||
| And a Dragon sculpt, also an original design by me that's so ordinary :p anyway this practices have to increase! |
Wednesday, March 21, 2012

Sunday, February 26, 2012


Tuesday, January 3, 2012
untitled280
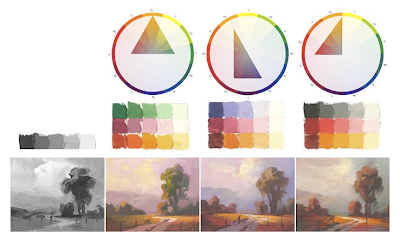
Been trying to paint with this gamut mask technique introduced by James Gurney's Color and Light, and I'm slowly getting it now, well more practice for me to go so back to paint!
For more information about gamut mask tool, visit here or click on the image above.
Monday, January 2, 2012
untitled279

Hi, its me again. LOL of coz it will be me!
Just watched MI : Ghost Protocol in IMAX this evening, and have to say i'm lovin it! Maybe IMAX will be my preference from now on. And damn, Tom Cruise really got balls of steel! You're the man!
Sunday, January 1, 2012
untitled278
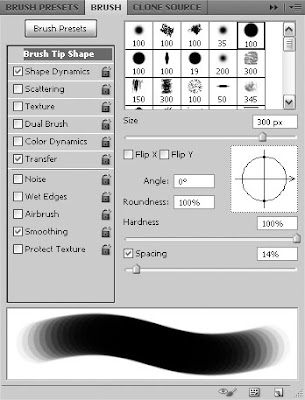
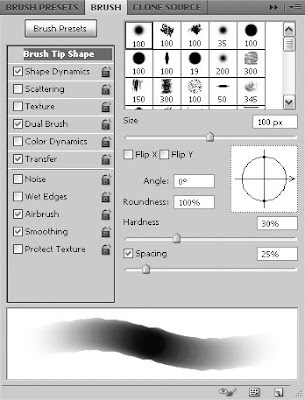
Hi guys, so I often get a lot of questions regarding the brushes that I use. What I always replied is that those brushes are the default ones from photoshop. Well now that I look at it, not 100% default lol. Here's some of those that I use for almost all of my stuff, kind of the universal type for me I guess. So let's have a look!
1) Airbrush Hard Round
I use this one mainly to get the effect at the end of the stroke, or when I lazy to switch to Painter for the painterly effect because this brush is very hard to do blending for me. A default one, just search for it in PS.
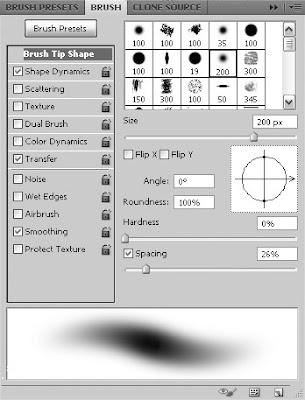
2) Hard Round with TRANSFER (Opacity and Flow Jitter) enabled
This brush is ideal for doing almost anything lol. Sometimes I use this for sketching or blending, both works good. However I only use this when I wanna get a rougher blending effect because of the hard solid edge it got. This one is default as well.
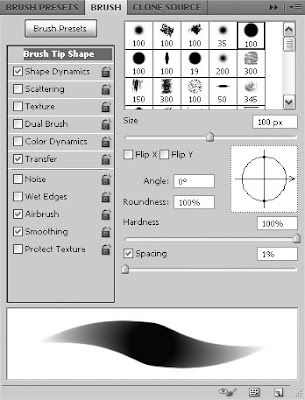
3) Randis Brush
The reason I give it that name because yeah, I learnt it from a great artist RANDIS ALBION who is kind enough to share his stuff in facebook. I love to use this one the most, as It can produce both soft and hard edge stroke, depending on how strong u press on the tablet. Use this one 90% in my painting! To learn how to make it, go here.
4) Airbrush Soft Round
Use this default one mostly at the end of the painting, to further soften up certain edges. I always tell myself that a painting needs to be balanced with a soft and hard edge, also soft and hard can create contrast and focus. So this is when this brush come in handy.
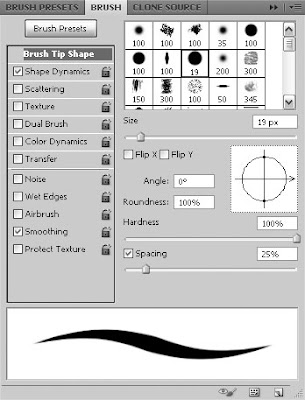
5) Hard Round
You probably know this lol. To create really hard edge in a painting, sometimes this is good for super clean lineart if you're into neat stuff.
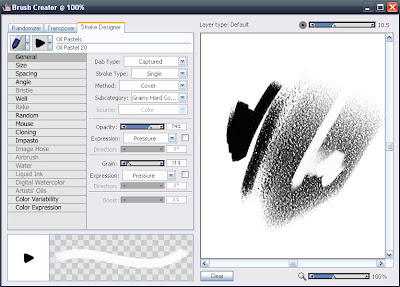
6) Oil Pastel
This one is from Painter. Used this one to get the grainy effect when painted with a little pressure.
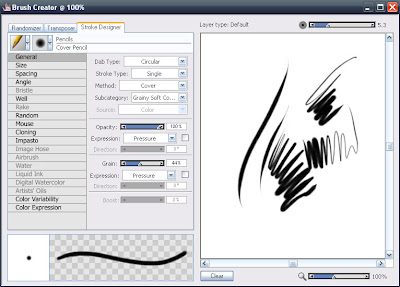
7) Cover Pencil
Another one from Painter, my favourite brush for sketching/lineart etc. I like the pressure sensitivity for this brush in Painter, easier to control compared to Photoshop. Perfect for my taste!
Yep that's all, these are brushes that I found suits me best after all these years of trying out digital art. I've been using a hell lot of brushes to mention but those gone bad for me after a while lol. Well back to the good old saying, basics are still important than these tools. You're still screwed if you dont know or have a weak basic, they cant help to make a good work, only will enhance your work when you got a strong foundation. Alrite till the next time, any questions just drop them for me!

1) Airbrush Hard Round
I use this one mainly to get the effect at the end of the stroke, or when I lazy to switch to Painter for the painterly effect because this brush is very hard to do blending for me. A default one, just search for it in PS.

2) Hard Round with TRANSFER (Opacity and Flow Jitter) enabled
This brush is ideal for doing almost anything lol. Sometimes I use this for sketching or blending, both works good. However I only use this when I wanna get a rougher blending effect because of the hard solid edge it got. This one is default as well.

3) Randis Brush
The reason I give it that name because yeah, I learnt it from a great artist RANDIS ALBION who is kind enough to share his stuff in facebook. I love to use this one the most, as It can produce both soft and hard edge stroke, depending on how strong u press on the tablet. Use this one 90% in my painting! To learn how to make it, go here.

4) Airbrush Soft Round
Use this default one mostly at the end of the painting, to further soften up certain edges. I always tell myself that a painting needs to be balanced with a soft and hard edge, also soft and hard can create contrast and focus. So this is when this brush come in handy.

5) Hard Round
You probably know this lol. To create really hard edge in a painting, sometimes this is good for super clean lineart if you're into neat stuff.

6) Oil Pastel
This one is from Painter. Used this one to get the grainy effect when painted with a little pressure.

7) Cover Pencil
Another one from Painter, my favourite brush for sketching/lineart etc. I like the pressure sensitivity for this brush in Painter, easier to control compared to Photoshop. Perfect for my taste!
Yep that's all, these are brushes that I found suits me best after all these years of trying out digital art. I've been using a hell lot of brushes to mention but those gone bad for me after a while lol. Well back to the good old saying, basics are still important than these tools. You're still screwed if you dont know or have a weak basic, they cant help to make a good work, only will enhance your work when you got a strong foundation. Alrite till the next time, any questions just drop them for me!
untitled277


Trying to use this gamut mask thing that i learnt from James Gurney's Color and Light,
in order to have a better selection of colour scheme. Still not quite get it yet, need to have more trial and errors to fully understand how to use it. Was fun tho!

Wednesday, December 28, 2011


Monday, November 28, 2011

Thursday, November 24, 2011
untitled273

Main Character, Wu Chen.

In this place, people from a small village used to pray to a god, Zhong Kui 鍾馗 who is the Vanquisher of ghost . They build a statue for him as a pay of respect for the peace that he brought to them. Unfortunately many died before the sculpture was completed and it was eventually stopped as the place seems to be very evil. Hence the statue of Zhong Kui remains guarding at the place, However it's not vanquishing ghosts and demons but human beings. Rumours said Zhong Kui is angry at human for abandoning the plan, and some said ghosts and demons have taken over the place. Whatever it is, nobody dares to get near the statue as no one ever returns after stepping on the ground of Zhong Kui Valley.

Le Zhun Cave(乐尊洞), a place where the villain Qin Kui lives. Here Qin Kui kept most of his captured victims sealed in the ground of the caves, slowly consuming them day by day. Souls tried to escape but were trapped among the cursed marking on the ground.
Hi guys, these are the background concept art for my college assignment, we're required to come out with a story and design 3 characters (a main, and two villains), a "level A" background which is exterior, and also a "level B" background which is interior. Do give me your comments so that I can know where to improve on, thank you so much!!
Friday, September 16, 2011

Wednesday, September 14, 2011
untitled271

Process Vid :
http://www.youtube.com/watch?v=CNJJgTuAUHk
Colour studie from movie still. The objectives are to capture the value and colours from observations, trying to keep the brush selection to the minimum, no eyedropping, no layers, and no zooming. These studies last from 30minutes to 1hour long.
A lot more to catch up, gotta work hard. Thanks for viewing
Subscribe to:
Posts (Atom)